
Design Collections Interiors Living Space Ideas
Do It Yourself: Statement DIY Artwork!
Ever had a wall so Big you couldn't find a piece of art worthy of hanging? Here's how to make your own Statement Art Piece!
Before Pics…
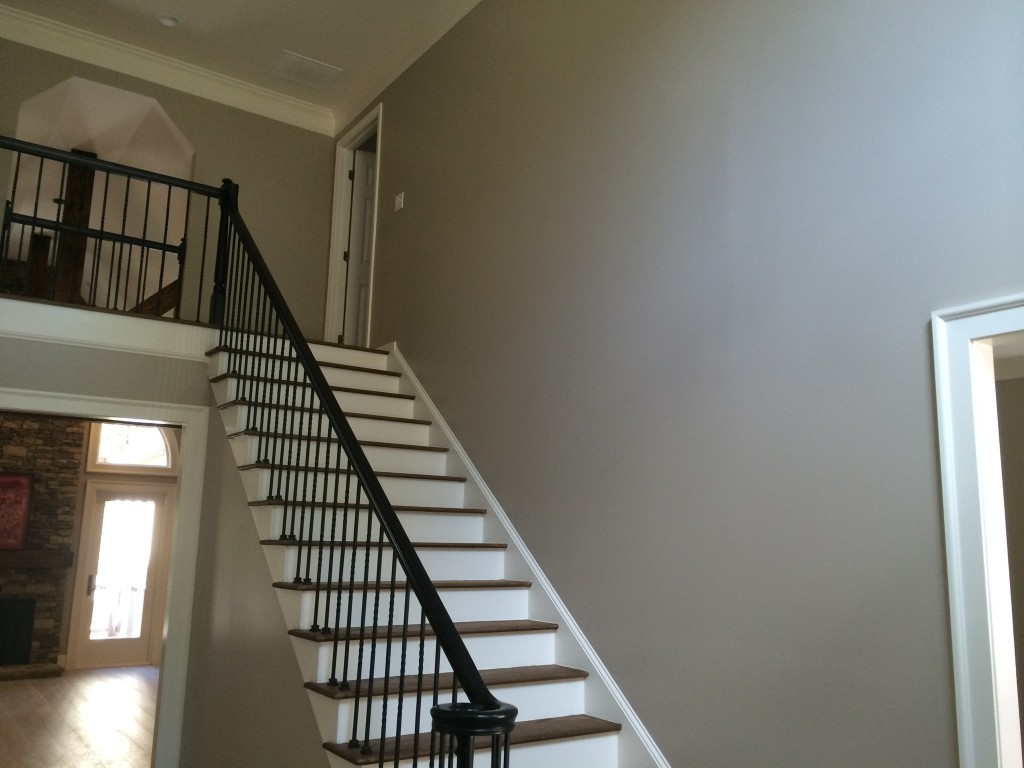
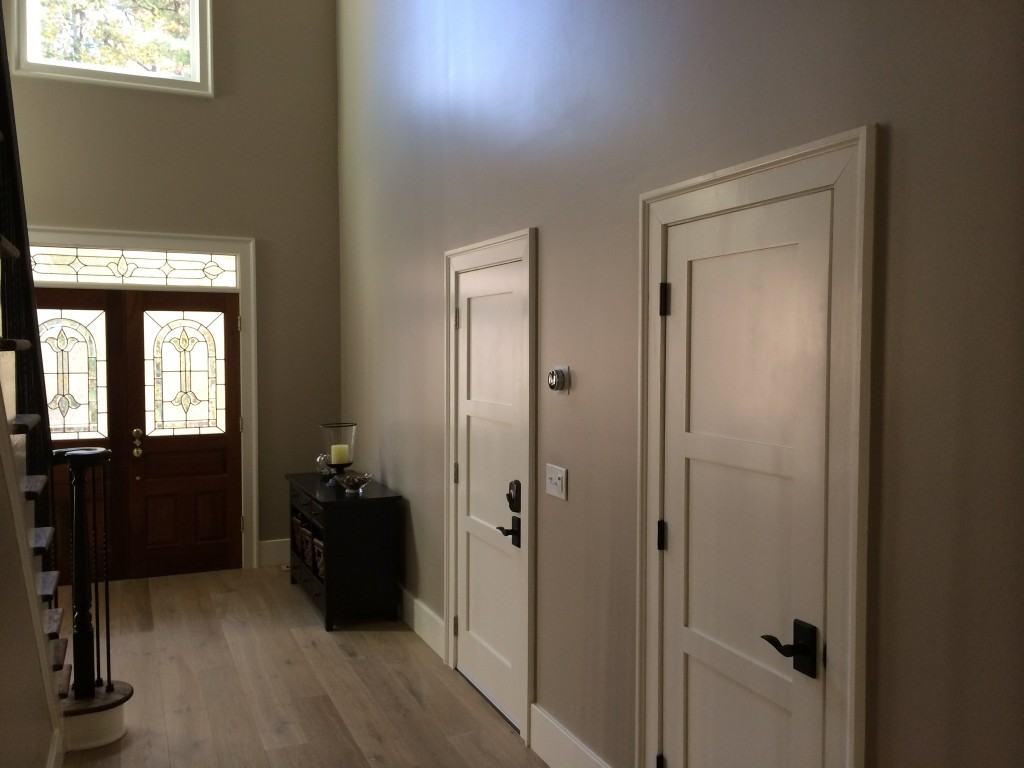
This house has recently been remodeled and the foyer along with it. It has beautiful ash colored floors and a neutral but rich putty gray on the walls.
It needs a story. Some life. Some color! We need ART!
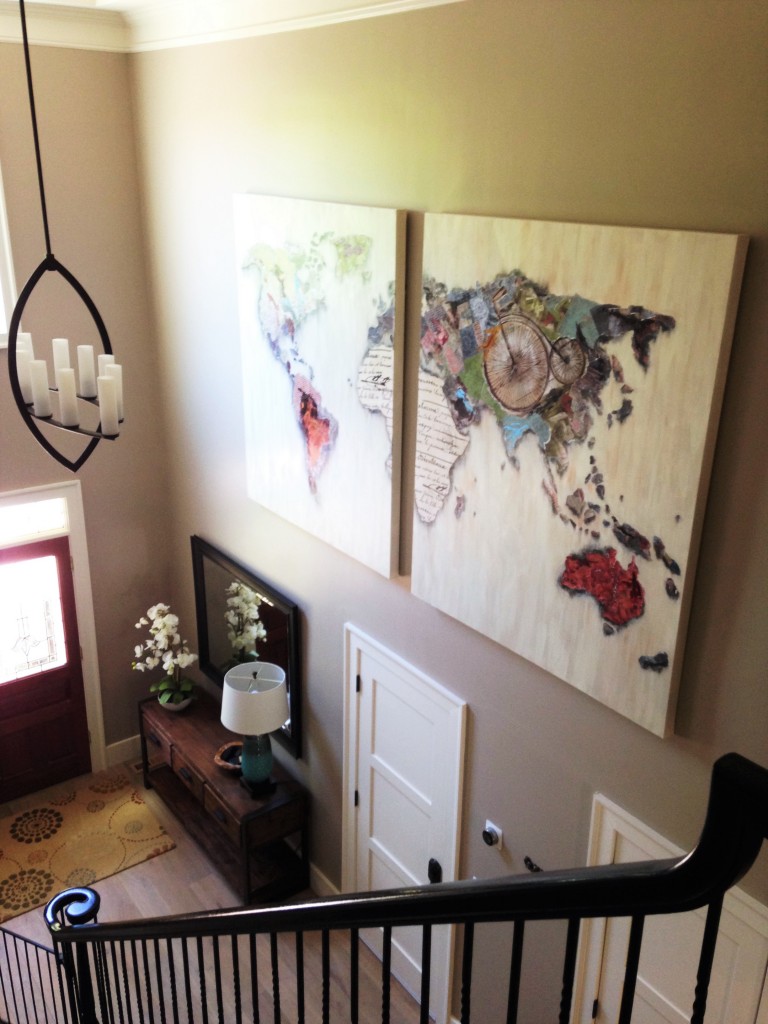
The wall to the upper left as you walk in the door is the first place guests see. We need something at least 9 FEET wide to fill the space enough to be proportional to the wall. An art piece like that would cost a fortune! Time to roll up our sleeves, put on our art smocks (I don’t really own one of those), and get painting.
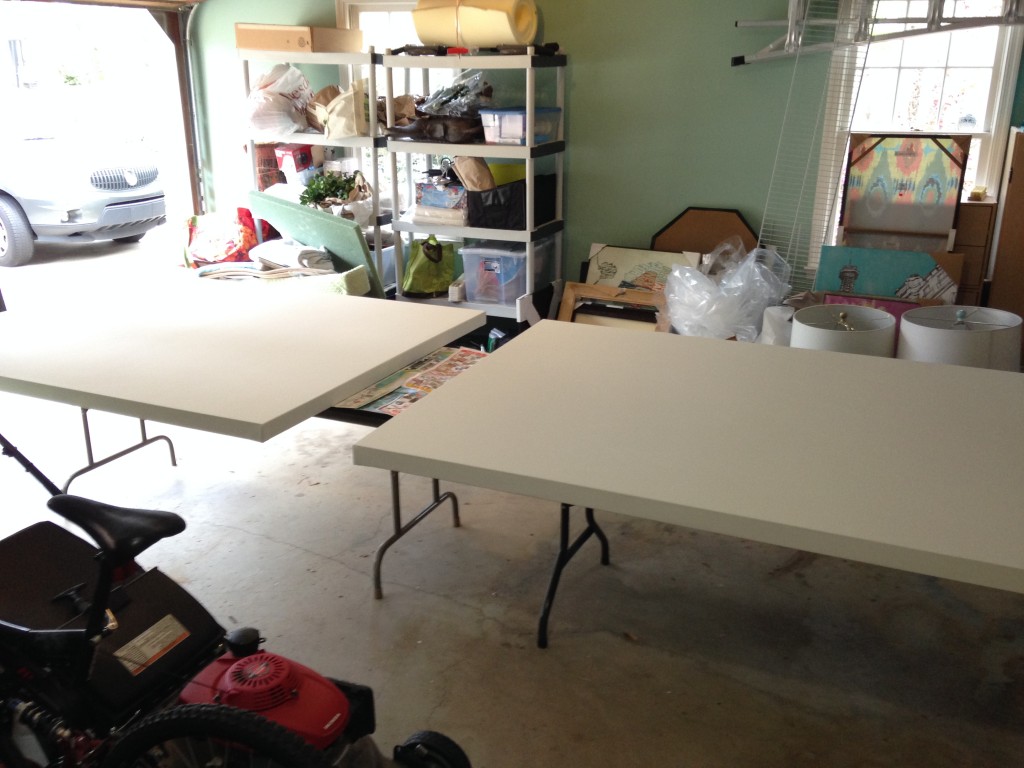
We ordered two canvases from the local art supply store. Thick wrapped canvases measuring 4′ by 6′ and already primed. The store delivered them for a nominal fee and we set them up in the garage on party tables to put a basecoat of creamy ivory as our background color.

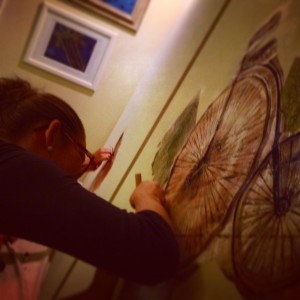
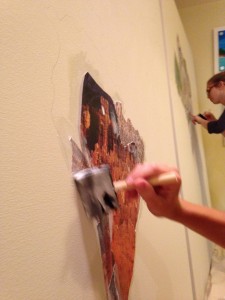
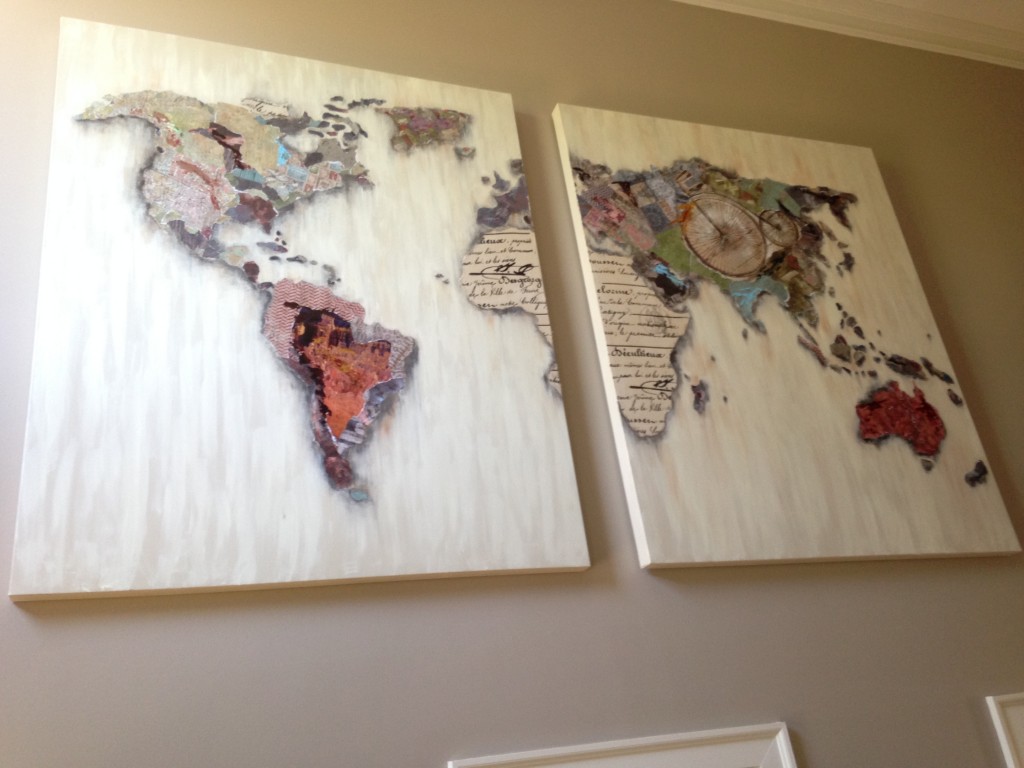
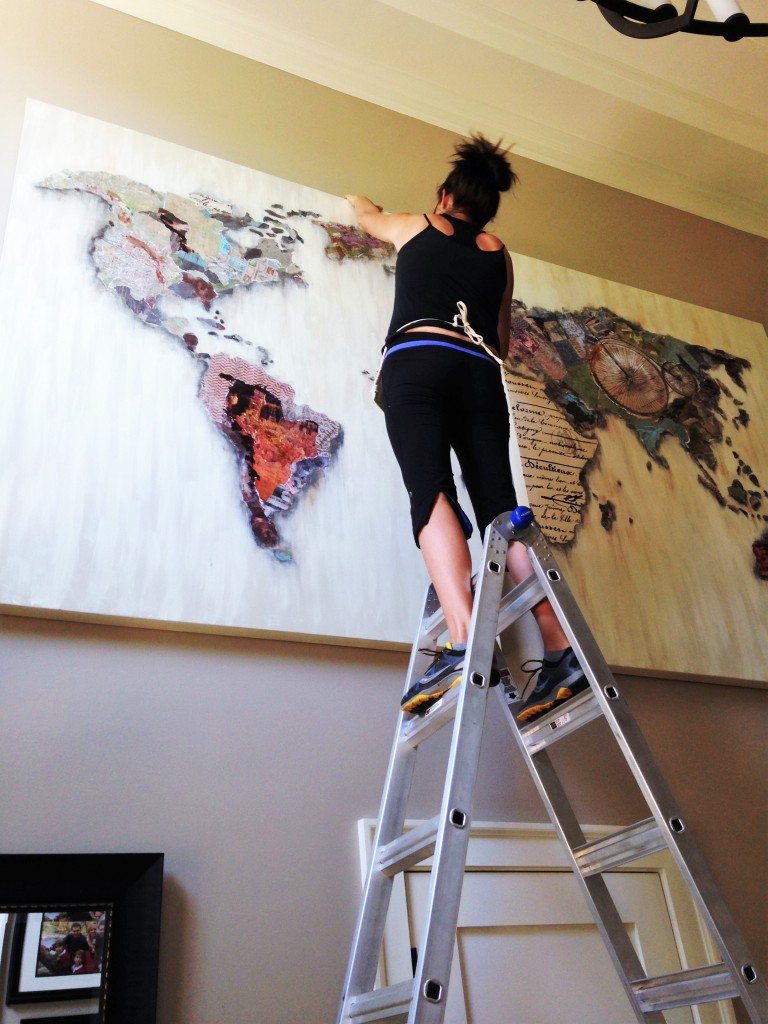
The clients are a really cool couple. We kind of adore them! The foyer is where your story should start in your home, so we plan on telling a story in this massive art piece. We treat the 2 canvases as 1 large canvas and draw a map of the world across the two using a projector and a photocopy translucency of a map from an encyclopedia. The story comes in with papers and fabrics that are clues to their life together. Where they’ve lived and traveled, their hobbies and interests are all represented. We collage on the papers by ripping them and gluing them on with Mod-Podge. Wherever the papers don’t overlap, I paint in with colors matching the paper or fabrics.
PROJECT IN A NUTSHELL (SHOPPING LIST PROVIDED BELOW)
- CHOOSE YOUR CANVAS SIZE AND PLACE ORDER FOR DELIVERY
- PAINT THE BACKGROUND COLOR WITH WIDE BRUSH & ACRYLIC OR LATEX PAINT
- HAVE IMAGE COPIED ONTO TRANSPARENCY FILM AT LOCAL COPY CENTER
- PROJECT IMAGE & TRACE ONTO CANVASES
- TEAR OR CUT FABRICS & PAPERS THAT TELL YOUR STORY
- COLLAGE THE PAPERS/FABRICS ONTO THE CANVAS USING MOD PODGE & A BRUSH
- PUT A LAYER OF MOD PODGE ON THE CANVAS, LAY THE PAPER ON THE GLUE, THEN BRUSH AGAIN WITH THE MOD PODGE
- LET THE COLLAGE DRY
- FILL IN GAPS WITH ACCENT PAINT COLORS USING A SMALL DETAIL BRUSH
- ONCE DRY AND ALL THE ACCENT DETAILS ARE DONE, BRUSH ON TOP COAT WITH CLEAR AND SLIGHTLY TINTED ACRYLIC GLOSS GEL MEDIUM
- HANG YOUR MASTERPIECE (OR HIRE SOMEONE TO DO IT)

Once the collage is done, I use good quality acrylic paint with a supple brush and add in a slightly darker tinge to create an old world streaked effect. This will be the overlay to the painting that adds depth and makes the layers even more rich.
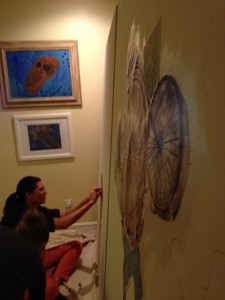
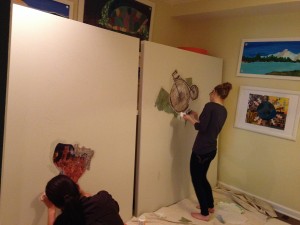
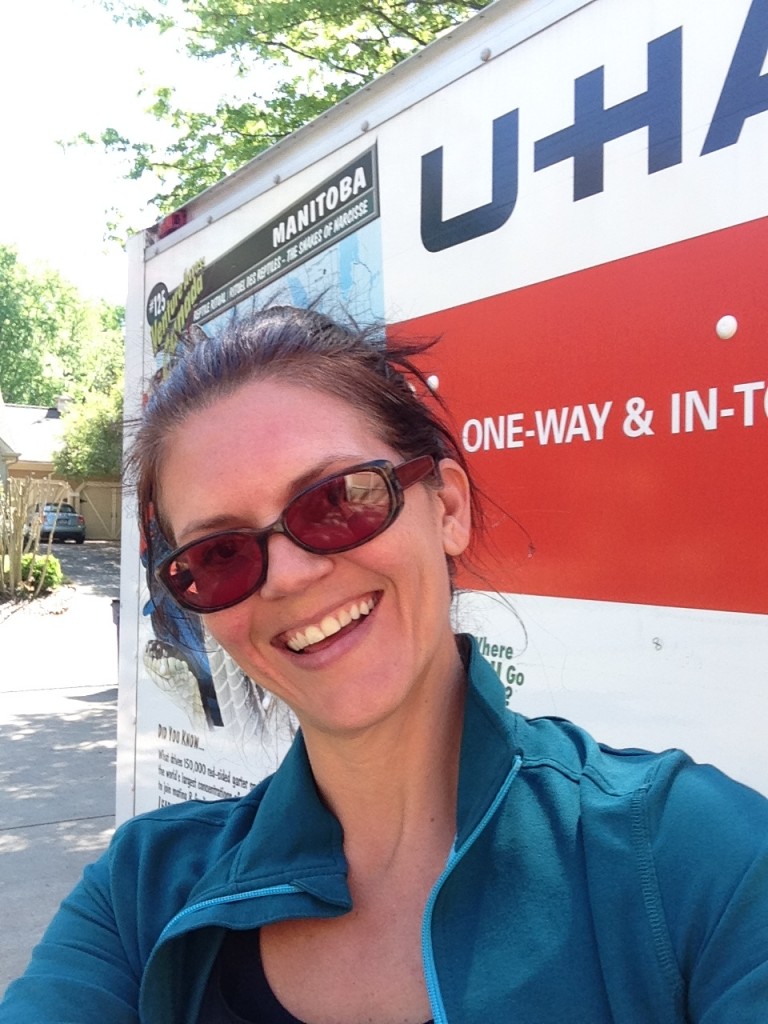
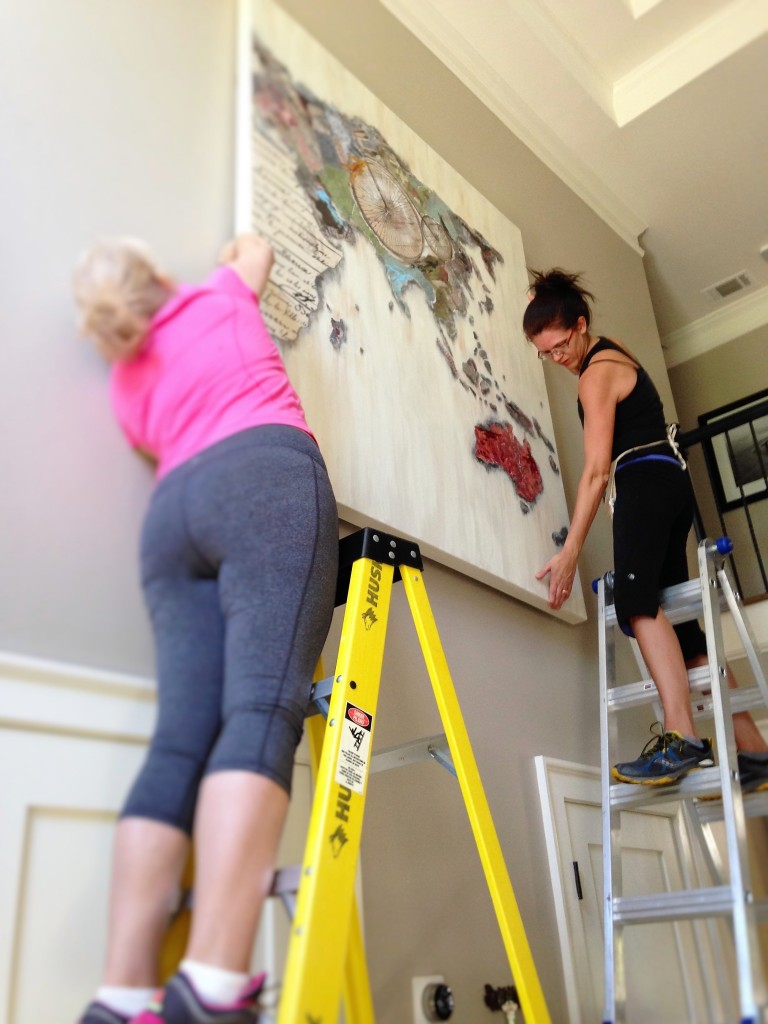
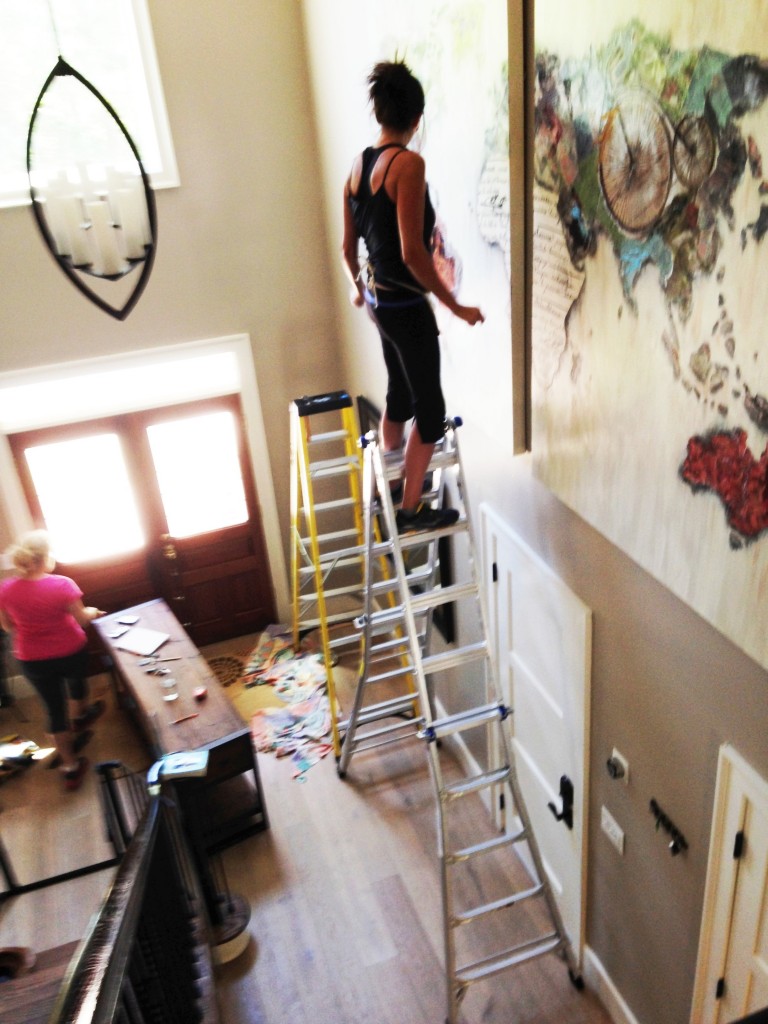
Now we have to hang this sucker! It’s Mammoth! So big that we rent a UHaul to drive it over to the client’s house (obligatory truck selfie). We pack up the big ladder & get to work!
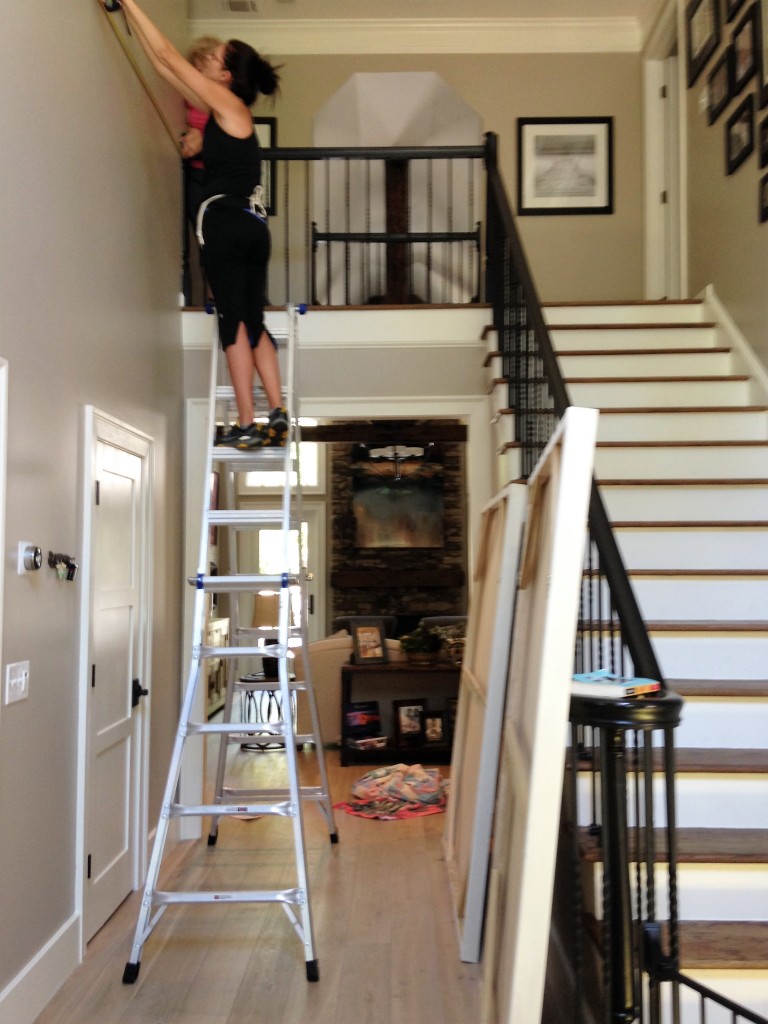
The installation took on its own form of fun. What do you get when you take a 6’1″ tall chick and put her on a 12′ ladder? A lot of jokes and fun! … and maybe a few cuss words
-
- Measure Mandy
-
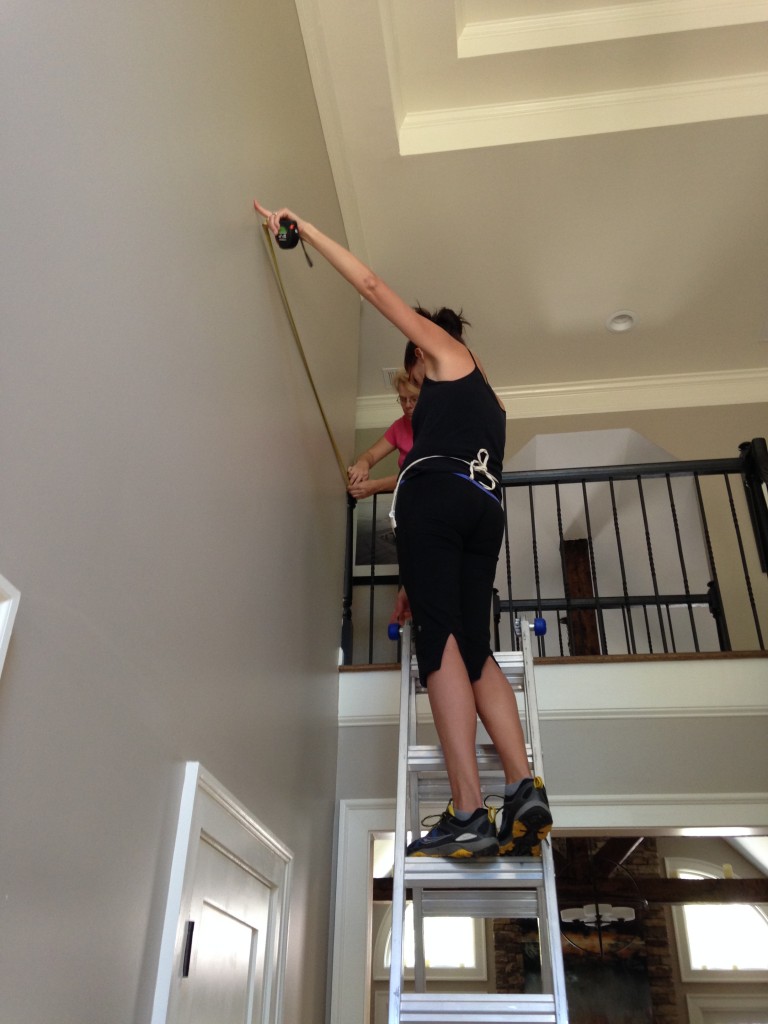
- It Takes A Team
-
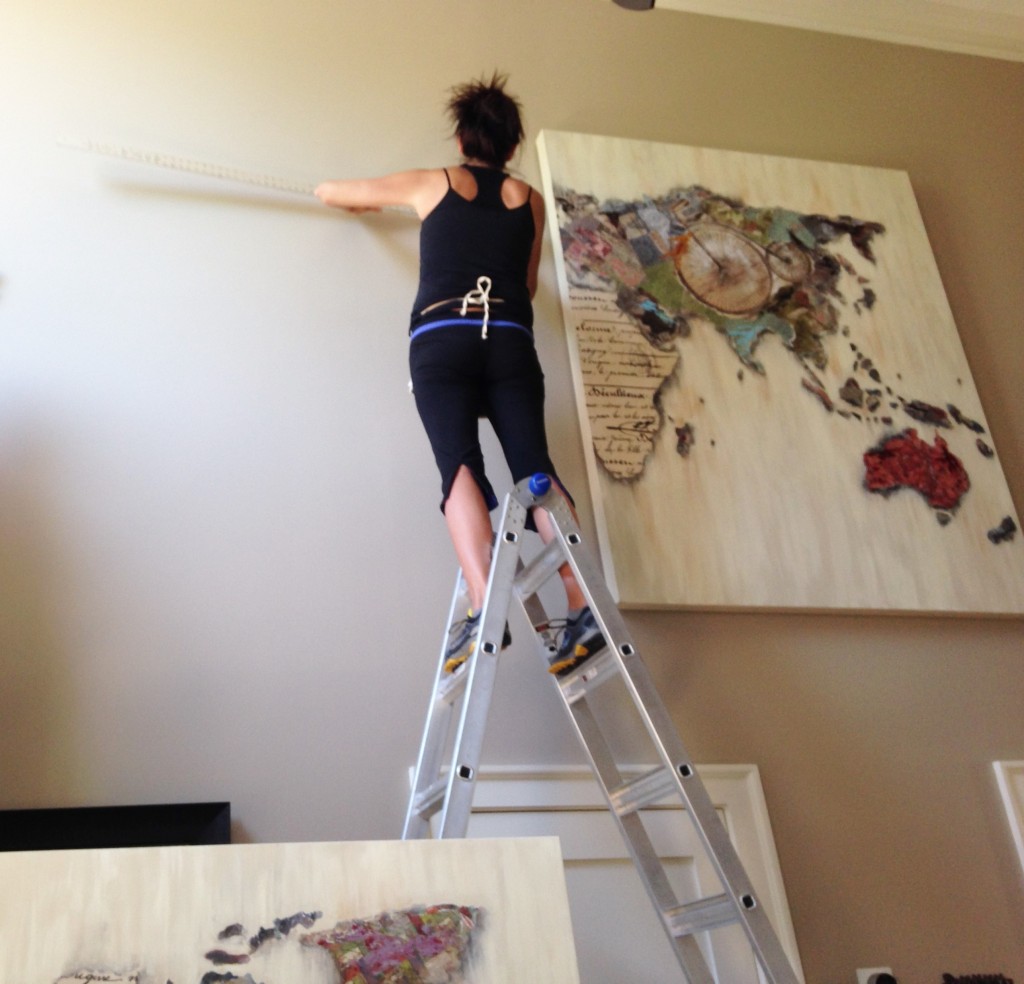
- Keep It Level
Thank God for inner thigh strength because I straddled that ladder for hours hanging these pieces! Measuring and a good bit of thought went into what the right height would be.
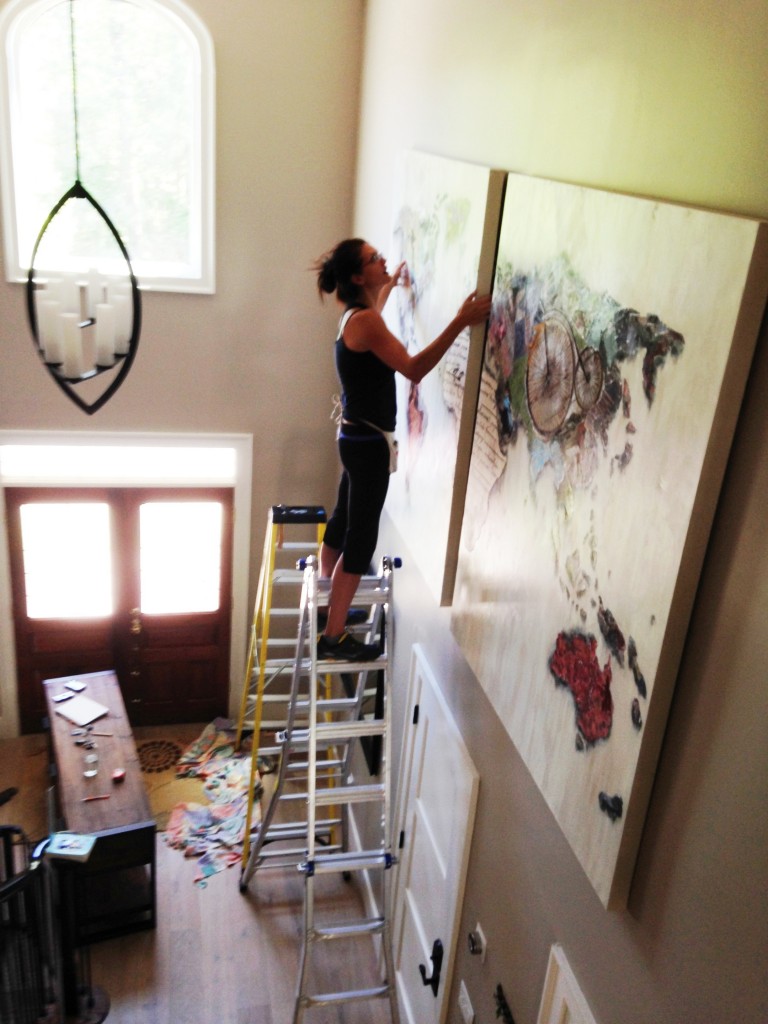
The final result is so pretty and perfectly them. The clients loved every little personal touch we put in these two pieces and now makes a statement by welcoming guests with their visual story.
What Would Your Story Be?
LEAVE US A NOTE IN THE COMMENTS ON WHAT TYPES OF PAPERS & FABRICS YOU’D USE TO TELL YOUR STORY IN A STATEMENT ART MAP LIKE THIS
(ie: French Writing because I love Paris, Italian Paper for our honeymoon, Modern Art was what I studied in school, Florals since I love to garden, you get the gist)